This year in Onsite Installer we will visit all parts of an onsite wastewater treatment system. This month we focus on a component that is extremely important but often overlooked, and that is the piping.
There are several applications for piping in an onsite system. First, there is the building sewer that connects the system to the house. Second, there is piping from the septic tank to another pretreatment device, the pump tank, or the soil absorptions system. Third, there is the supply pipe from a pump tank to the distribution network. Finally there is the distribution piping in the soil treatment area.
PVC dominates
For now, we will focus on the building sewer. In the past, a number of piping materials have been used for this purpose, including clay, Orangeburg and cast iron. These materials have given way to plastic polyvinyl chloride (PVC).
In installing piping, first make sure the materials are not defective or damaged. Pipe with defects such as cracks, or pipe that has been weakened by long-term exposure to sunlight, may no longer be watertight and may invite in root intrusion, leakage, or infiltration of clear water into the system.
For a building sewer, the pipe should be at least 4 inches in diameter to accommodate toilet paper and large solids. Because of the solids, there are maximum and minimum slopes needed to deliver the raw sewage to its destination. The minimum slope ensures that sewage runs down the pipe without slowing down, resulting in clogs. Conversely, if the slope is too great, there is a risk of the water and solids separating, solids accumulating, and the pipe plugging.
For 4-inch PVC piping and a building sewer less than 50 feet long, the minimum slope is 1 inch in 8 feet, or 1/8-inch per foot, and the maximum is 1/4-inch per foot. For sewers longer than 50 feet, the slope should be 1/4-inch per foot.
Provision for cleaning
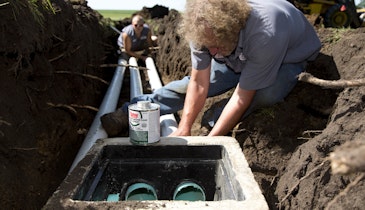
A cleanout should be installed at the wall outside the home so that the pipe can be cleaned or jetted from the outside, keeping any spills or problems outside the home. The cleanout should be made with a full Y branch fitting and should extend at least 2 inches above grade.
The cleanout should be the same size as the pipe it serves. The distance between cleanouts in 4-inch pipe should not exceed 100 feet (or 50 feet for pipes 3 inches or smaller). The riser pipe of the cleanout should be of the same pipe material. The cover or plug should be a raised nut or recessed socket threaded for removal.
You need to be familiar with state and local codes affecting setback distances. The main issue is to make sure drinking water pipes and sewer pipes are separated. To facilitate this, different colored piping is used: blue for drinking water, green for wastewater, and purple for treated wastewater to be reused for irrigation. Setback requirements and methods to ensure separation will vary — it is your job to know these requirements.
Tight joints
Another safety concern is making sure the pipe is watertight and does not leak raw sewage or invite root intrusion or infiltration of surface water into the system. This requires proper gluing techniques and, upon completion, a pressure test before the piping is backfilled.
To provide watertight connections, the gluing or solvent welding of the sewer pipe is a five-step process:
• Prepare the pipe, making sure it is clean and not damaged.
• Cut the pipe to length with a square end.
• Deburr the end with a file or a knife.
• Bevel the cut end 10 to 15 degrees with a file or a reamer.
• Apply the primer and cement to both ends and twist one-quarter turn.
When using pipe lengths with spigot and bell ends, the pipe should be oriented so the flow travels from the bell end to the spigot end.
Proper location
The final concern is proper piping location and installation. All plastic pipe should be placed on a solid base with the proper slope. The base can be granular fill or, where appropriate, natural unexcavated soil. If the soil is excavated and then backfilled, it should be compacted in 6- to 12-inch lifts.
To allow proper backfilling around the pipes, the trench bottom should be three times the diameter of the pipe — so for 4-inch pipe, the excavation should be 12 inches wide. It is important to lay the pipe on-grade with the proper slope and to make sure there are no bellies or dips. Check the grade frequently with a laser level during installation.
The excavation should follow the designed pathway for the pipe. Be careful not to over-excavate, as that will require additional work during backfill. If the excavation is in any organic material, such as peat, that material should be removed from the excavation. Then use sand or pea rock to bring the base to the required elevation.
Use a gradation that minimizes migration of materials when using rock for bedding and haunching. The key is to avoid any low spots in the pipe. During backfill, avoid having rocks or hard soil clods in the fill material, as these can crack the piping or damage the pipe connections.
In coming issues, we will look specifically at excavation and backfilling for the piping and at piping used in other specific or parts of the system.