Order Digital Reprints
Filed Under
Sign Me Up!
Sign up Digital!
Subscribe to Print!
Interested in Pumps?
Get Pumps articles, news and videos right in your inbox! Sign up now.
Pumps + Get AlertsAs mentioned in recent articles on installing tanks, a good pump installation starts with making sure that the pump tank is watertight. In pump tanks, we have the same concerns as with septic tanks in making sure inlet and outlet penetrations are watertight, and we have additional concerns about the riser and the locations where the pump wiring leaves the tank.
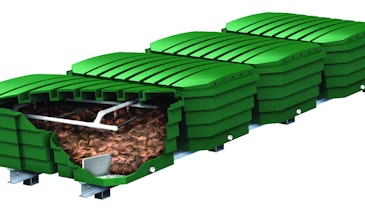
Proper installation of the pump discharge assembly will ensure that the pump is accessible, replaceable and properly wired. The pump discharge assembly consists of all of the piping and components from the discharge to the point at which the supply line leaves the tank. This includes the pump, pump controls and discharge line. All of this should be installed so that it is accessible from the surface.
Proper bedding
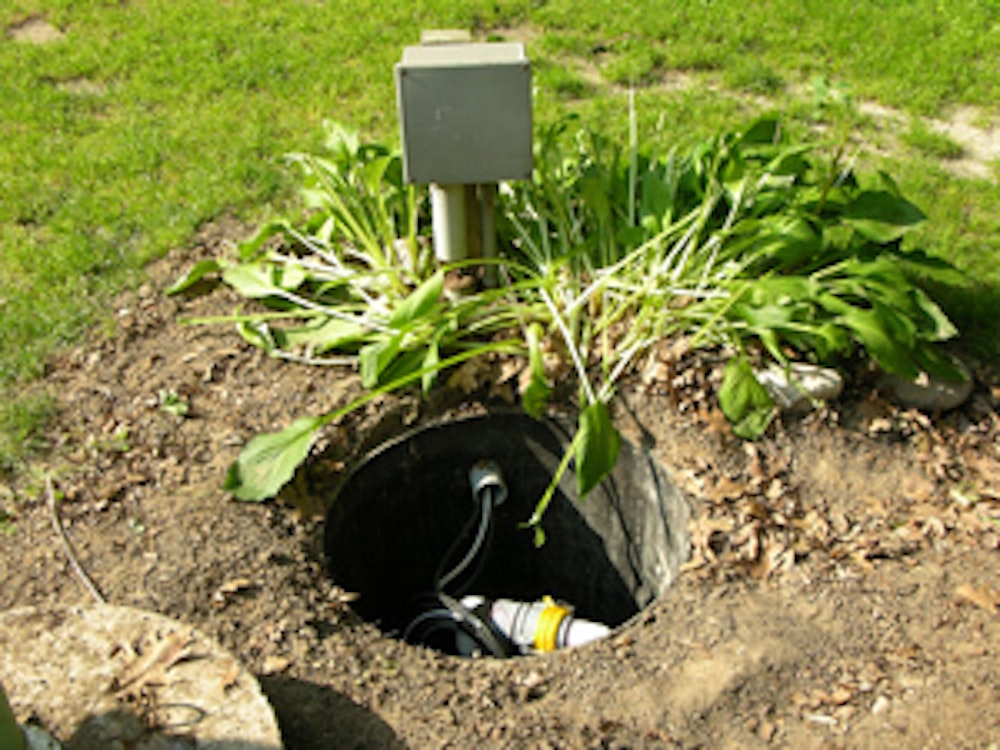
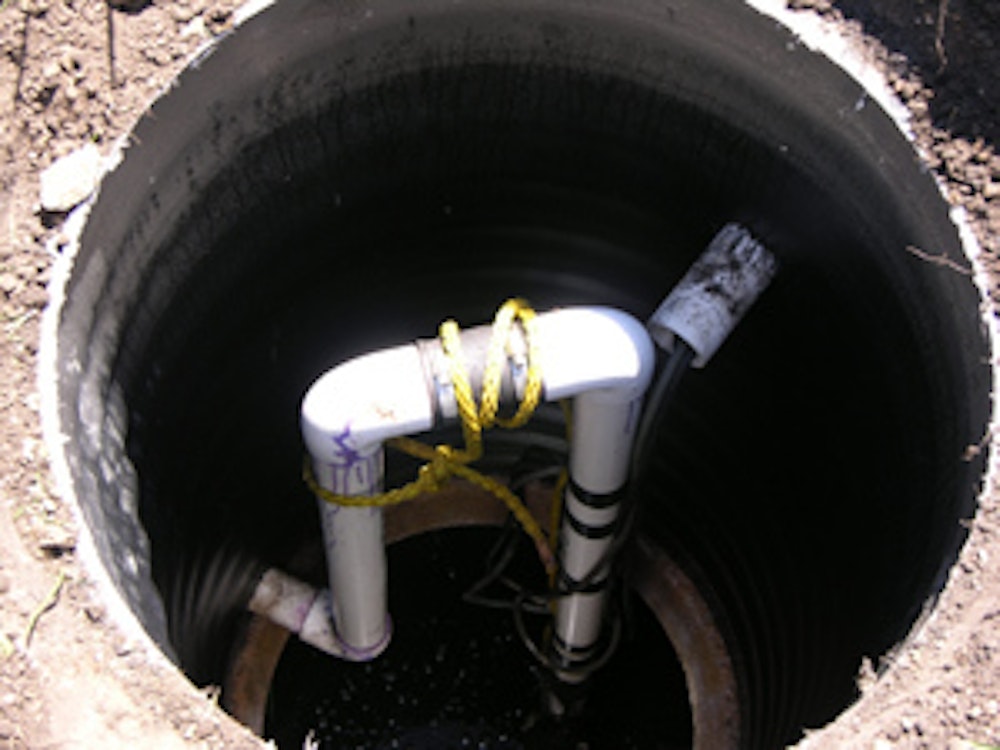
The pump should be installed directly under the manhole, and this means using risers to the surface. Typically, the discharge piping is brought up into the manhole, where there is a quick disconnect, so that the pump assembly can easily be removed for replacement or service. The supply piping leaves the pump tank through the riser. This penetration must be sealed and watertight. In addition, proper backfilling around the riser is critical. The supply piping needs to be well supported and laid so that the pipe drains back to the tank.
A common way to provide protection and support is to put the 2-inch supply pipe through a piece of 4-inch pipe across the excavated backfill area. A 1/4-inch weep hole should be provided at the bottom of the pipe inside the riser to ensure that the supply pipe will drain back into the tank without going back through the pump. This arrangement without a check valve is critical for pumping situations in cold climates, where water standing in a pipe will freeze.
Quick disconnect
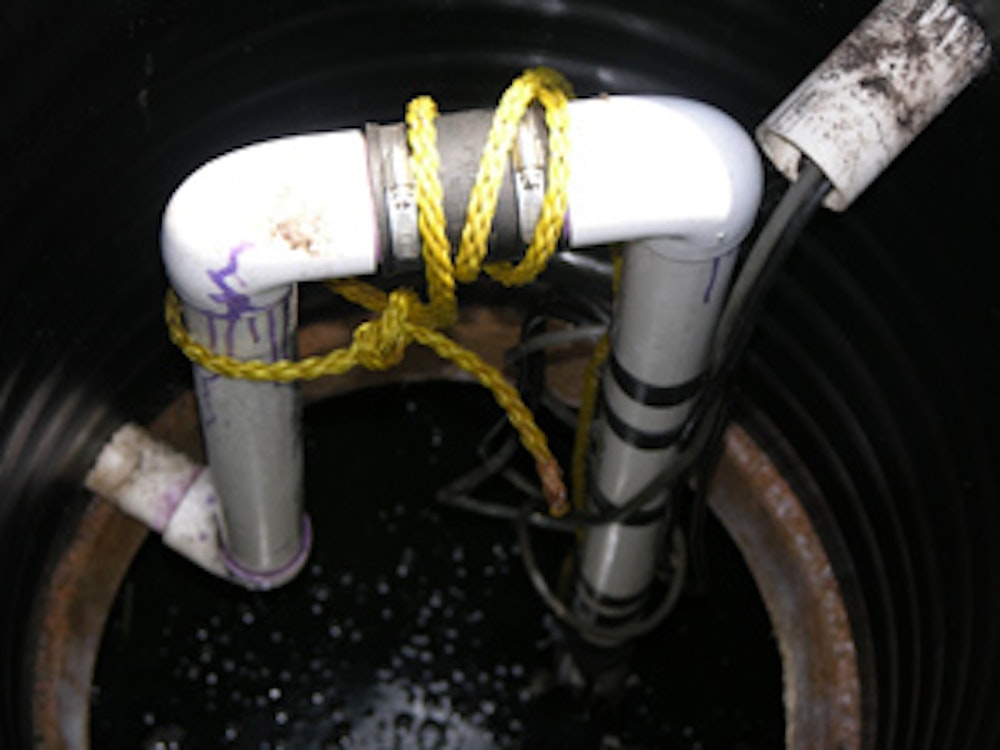
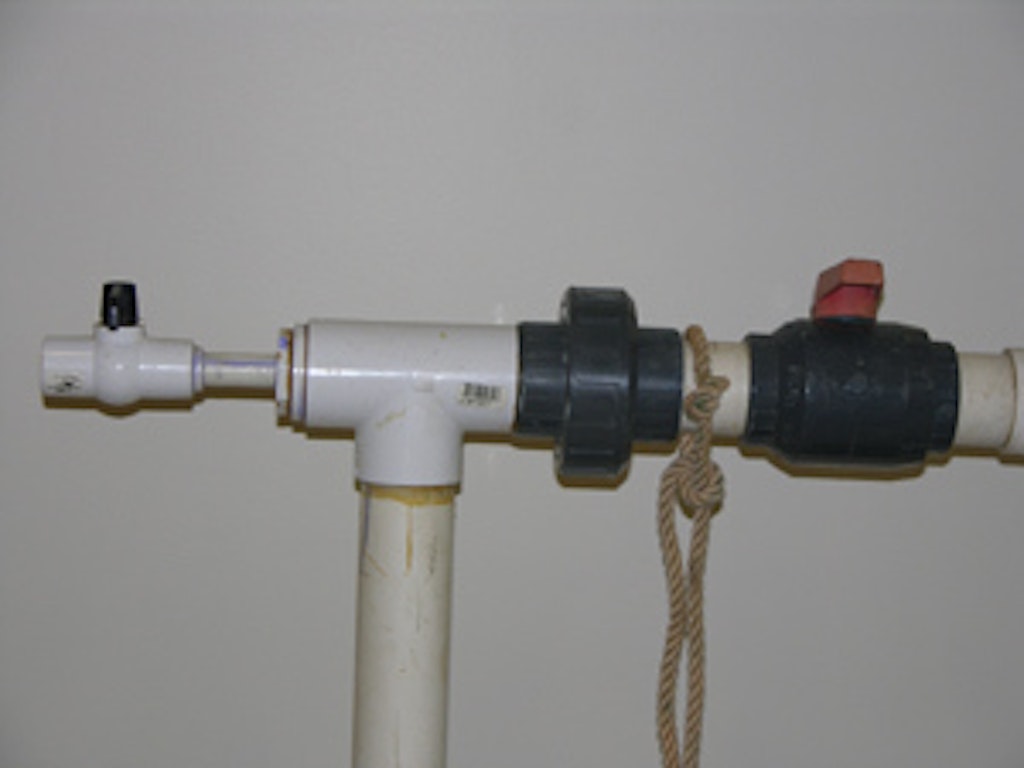
The quick disconnect can be a three-part threaded union, a camlock fitting, or some other simple inline disconnect able to withstand the pressure created by the pump system. There are numerous camlock products on the market that make it easy to separate the pump assembly.
Rubber connectors with stainless steel bands are not appropriate for quick disconnects in pressure situations. We like to say they become automatic disconnects! Likewise, if you have to use a reciprocating saw to disconnect the pump, that indicates a poor installation.
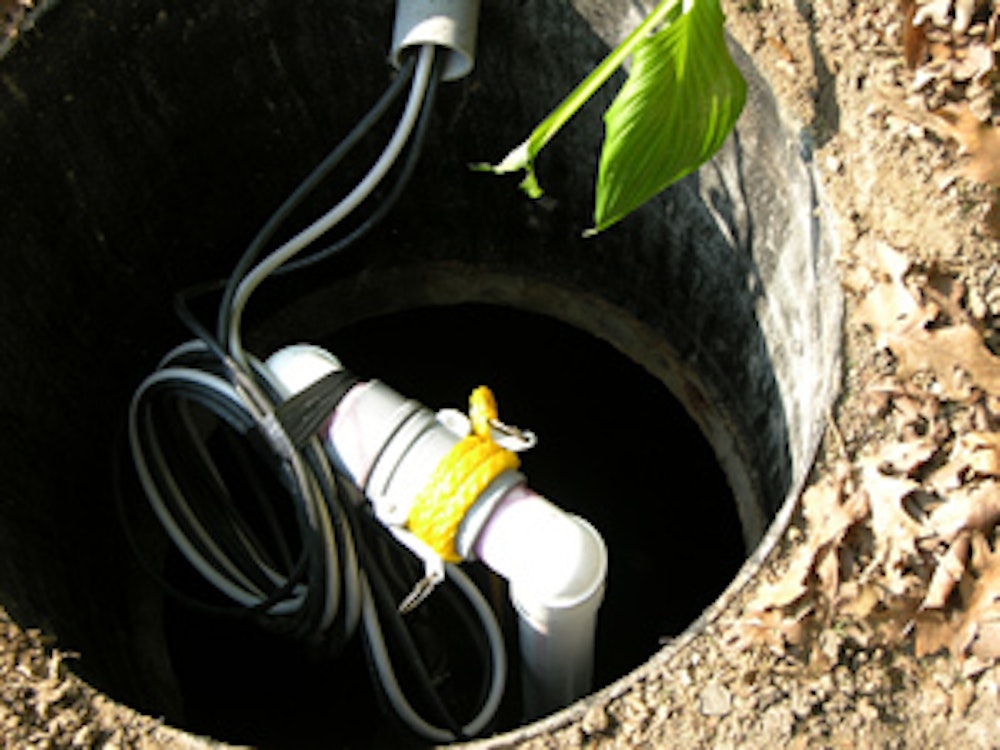
The location of the quick disconnect in the riser should be no more than 18 to 20 inches from the access lid. This is the distance a person can reach down without entering the tank to disconnect the pump and then lift it to the surface.
A length of nylon rope, stainless steel cable, or other noncorroding material should be attached to the pump to facilitate removal during maintenance. It must be strong enough to hold the weight of the pump and assembly.
Mounting floats
The pump and controls should be replaceable – that means the pump wiring can also be taken out without a lot of extra work or digging. The wires should be run through a 2- to 3-inch conduit – large enough for any plugs to be pulled through the conduit and the control box.
Using conduit with sweep 90s where the piping bends will allow for removing and returning cords when the replacement or repair is complete. If a plug is removed from a pump, it usually voids the warranty, so it is important to make these provisions as part of the installation.
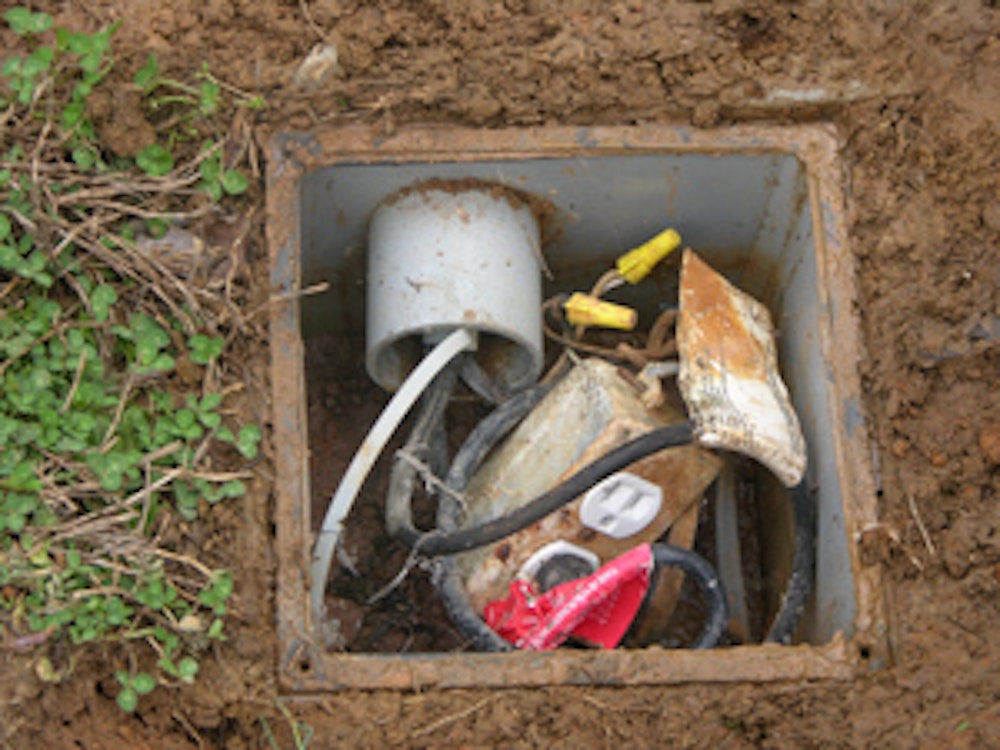
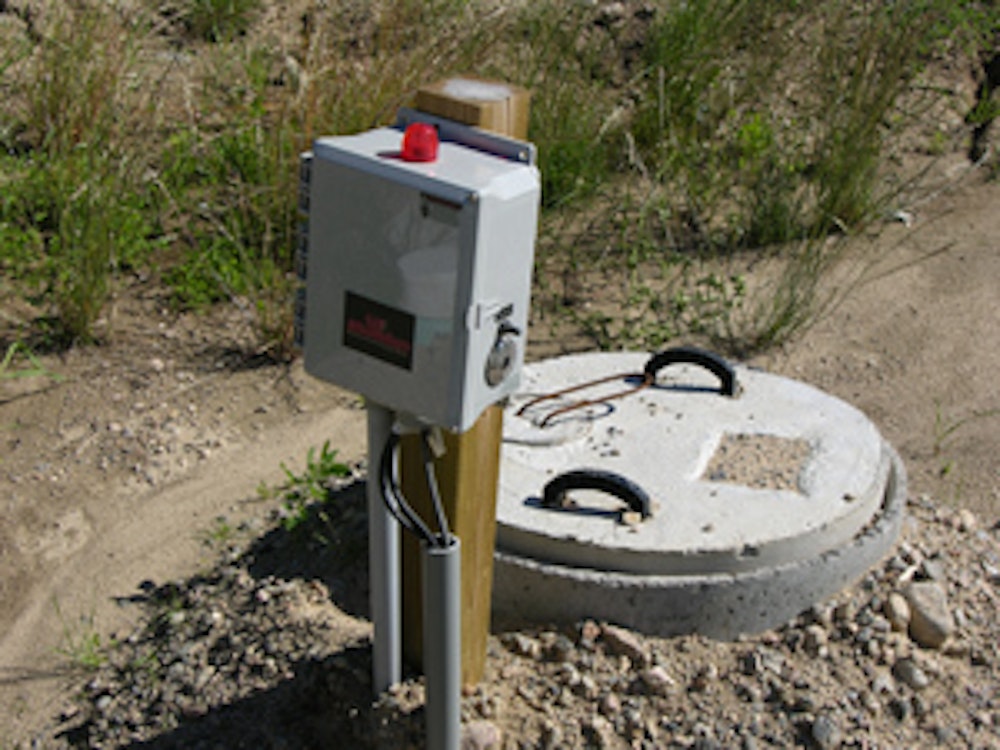
Remember that any electrical connections need to be made outside the corrosive tank environment and located in a weatherproof box near the pump tank or in a nearby building. It is also important to have the pump and alarm control floats on a separate float tree. This allows for the removal of the pump without affecting the float settings.
Also, in a repair or replacement situation, remember that pumps are sized and specified as part of a complete delivery system: The pump and the pressure distribution system are tied together. When the pump is replaced, it must be replaced with a pump that delivers the same amount of effluent. Replacing it with a pump that is close will not do! It must be replaced with the model specified by the designer; or the designer needs to re-evaluate the whole system.
When installed, the pump should be elevated three to four inches off the bottom of the pump tank. Today, a number of pump tanks come with a cast-in pedestal for the pump. If this is not available, you can use the old tried-and-true method of placing several 4-inch-wide blocks on the bottom of the tank to keep the pump above any solids that may collect.
It takes more than one block to make replacement from the surface easy. Think of trying to balance a pump on the end of an 8-foot section of 2-inch pipe on a 4-inch surface at the bottom of the tank!
Proper wiring
The final piece to installation is having the pump properly wired. This means using watertight fittings, making sure the conduit is properly sealed so that gases cannot vent out through the control panel, and choosing the right size wire from the box to the pump. The wire has to be large enough to meet the power demand of the pump. If the wire is too small, the pump will not operate properly and will wear out prematurely.
Make no electrical connections inside the pump tank. Connections should be located in a watertight, corrosion-resistant junction box with watertight, corrosion-resistant fittings and a cover with a sealed gasket rated for outdoor use.
In all cases, installation procedures must follow the specifications of the U.S. National Electric Code (NEC). States differ on who is allowed to work on the pumping system wiring. In many cases, the work must be done by a licensed electrical installer. Make sure you comply with your state and local requirements. We will say more about panels, control boxes and wiring in future articles.