In previous columns, we discussed soil characteristics that are important to evaluate or determine the size and location of the soil treatment area. Based on recent questions, we thought now would be a good time to explore how the observations and descriptions can be obtained. Information about soil descriptions is available through a number of sources, including ASTM standard 5921 Subsurface Site Characterization of Test Pits For On-Site Septic Systems and the USDA-NRCS Field Book for Describing and Sampling Soils.
A few qualifiers before we continue: There are a couple of errors in the ASTM standard, so be cautious in terms of the structure descriptions, and while the NRCS Field Book can be downloaded from the agency’s website, it takes some time and effort to get it to print properly due to the small page format. Also, additional general soil information can be gained from published soil survey reports. They can provide good background information on soils and soil properties present in a proposed system location. Remember, there is no substitute for direct observation in the field.
Each of the soil horizons or layers that make up the soil profile should be described in terms of their color, texture, structure and consistence. Horizons should be evaluated for their suitability for treatment and acceptance rate of septic tank effluent. Evaluation of the soil should be in its natural and undisturbed form.
THREE WAYS TO MEET GOAL
Three methods can be used to obtain soil samples that retain their form for evaluation. These are use of a soil probe, a soil auger and excavation of shallow pits. Each method has advantages and disadvantages. A soil probe is a hollow tube pushed into the soil. When extracted it provides an undisturbed soil column.
Soil scientists make use of hand probes, usually an inch in diameter, for routine soil survey investigations. They can probe to a depth of approximately 4 feet to provide a way to quickly assess the soils on site. To get a better look at the soil profile, a hydraulic probe mounted on a pickup truck is used. The probe is usually 3 inches in diameter and, depending on the soil conditions, can probe to a depth of 18 feet.
A soil auger, typically a hand-operated 3-inch-diameter bucket auger, provides a closer look at the soil than the 1-inch probes. The bucket has cutting tips that cut soil to fill the hollow bucket as the handle is turned. This method disturbs the soil, but the middle of the sample usually provides a natural look at the soil properties. Sometimes it can be difficult to get an accurate reading on the soil structure. Having firsthand knowledge of the soils in the area and the soil survey information can help make this determination.
Depending on the type of soil being evaluated, buckets with different types of teeth can be used to get the best sample. A bucket for cutting through sand has teeth closer together to hold the soil when the auger is removed. A bucket for clay soils will have the teeth farther apart to make sample extraction easier. Bucket augers typically obtain samples to a depth of 5-8 feet. In some cases, they can be used to deeper depths by adding 3-foot extensions to the 5-foot bucket auger. There are limitations to an operator’s ability to extract samples when wielding an 8- to 12-foot auger.
DIGGING A PIT
One major limitation for both the probe and soil auger is the presence of rocks in the soil material. We are reminded of this when conducting classes in the Northeast or Southwest. Some engineers are prone to using a truck-mounted flight auger to overcome this limitation. This is not an acceptable method because it destroys the soil structure, mixes soil colors and makes it hard to determine exact depths for changes in characteristics.
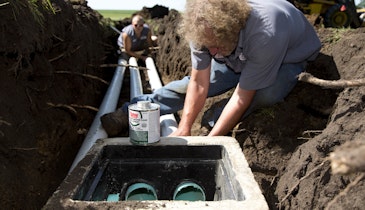
Excavating a shallow soil pit is the best choice for evaluation. A soil pit can be dug by hand or with a small excavator. This gives the best chance for a broader view of soil characteristics and the opportunity to get up close and personal with the soil profile. The chief drawbacks to pits include the potential to damage the soil treatment area, limitation of site access during installation and some safety concerns. So it is important to choose pit locations carefully to prevent damage and preserve site access, while ensuring the soil at the site is well represented. It is also important to maintain excavation safety when creating pits.
To write the soil description, the soil from a boring or auger should be laid out on the ground or in a tray (a 6-foot section of rain gutter is good for this), with the depth of the excavated soil corresponding to the depth of the hole. A tape measure can be laid out alongside the tray for easy reference. It is not a good practice to take an auger-full bucket at a time and try to write the description. In a soil pit, the tape measure can run next to the pit face where the description will be written.
Most soil characteristics, texture, color and consistence are described in a moist state. So have a water bottle mister handy to moisten, but do not saturate the soil. Descriptions should be done with adequate sunlight. If using trays, move them to ensure adequate lighting. If pits are dug, orientation should take lighting into account.
PROPER REPORTING A MUST
Forms are available to record these observations using the correct terminology. Most states that require soil investigations have unique forms that must be used. Make sure to use those forms, or if you have your own form, it should include the same information as the state form. Make sure all descriptions are complete and filed with other information about the site and installation.