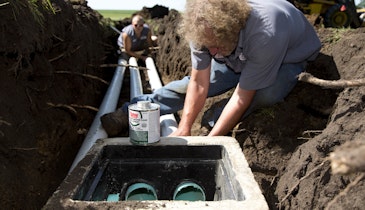
Installers are often called to troubleshoot situations where someone installed a pump that does not appear to be working properly. These problems occur for a number of reasons, as often related to something the owner has done as to the pump itself having problems. Manufacturing standards for all pumps have risen in the recent past, which means you can expect high performance and long life.
The first step in troubleshooting is to understand what is happening at the site. Gaining access to the pump is the first step. If you installed the pump, this will be easy, because you will have made sure it is readily accessible. If a less skilled competitor installed the pump, access can be a bit more time consuming.
The pump should be accessible and removable. Check the quick disconnect. If a fern co-coupling was used as the quick disconnect, this can be the root of the problem, as it may have become disconnected. Don’t just replace the hose clamps. Be sure to replace with a quick disconnect designed for the pressure in the system. There are a number of really nice products that provide the quick disconnect capability.
Run and check
The next step is to turn the pump on and see whether it is operating. Evaluating with your eyes and ears is an important part of finding the solution. Listen for the hum of operation and watch the effluent leave the tank. If the discharge pipe shakes and wobbles and there is no movement of effluent level, that signifies a problem.
Another useful tool is an amp/voltage meter. By checking the amperage draw on the pump, you can assess what is happening. For example, this step can identify whether there is a short in the system. If so, check all connections to see that they are in place and that there are no bare wires.
To use these tools, you need access to the power supply for the pump. When removing the pump from the system, make sure the power is turned off and locked out. This is more critical in the systems where the pressure is higher than the typical pump up in elevation for gravity distribution.
An example would be a drip irrigation system. In drip systems, the pressure is around 22 psi. That pressure can shoot filters out like a bullet if they are opened and the system is still turned on. Low-pressure systems typically operate at 5 to 10 feet of head, or about 3 psi, so all that happens is that you get wet.
Pump won’t start
Suppose you operate the switch and the pump does not turn on. Evaluation now begins with the power source. Is the power turned on in the home? Has the power cord been cut in the yard? Are all the connections in good shape? The connections need to be watertight and protected for long-term performance; ideally the connections should be made outside the pump tank.
The next components to evaluate are the floats and controls. The floats must move freely if they are to function properly. Any number of things can restrict float movement. Excessive FOG or other trash in the tank may be the culprit. At this point, you can use a sharp stick to knock the material off, then remove it from the tank.
The float can also become free-floating in the tank. Then the solution may be as simple as reattaching or repairing the weight for the float. The floats themselves also can wear out and require replacement. It is much easier to service the floats and verify that the controls are operating if you use a float tree to attach the controls.
If the controls are something other than floats, you need to verify the operation of those devices. One type of alternative to floats is pressure transducers, which operate with a change in pressure, typically in an airtight tube running from a sensor to a panel. Failure of this pressure tubing will cause the pump to fail. The usual remedy is to replace the tubing.
No water moves
If the pump sounds as if it is operating and the pipe vibrates, but the effluent levels do not change, another set of problems should be checked. The first is the proper voltage for the pump. Often, three-phase pumps are purchased for onsite systems, but the electrician ran two-phase power out to the pump. Check the pump label requirement and the wiring diagram to see whether this is the problem. If so, either the wiring or the pump needs to be replaced.
The next thing to check is whether the pump is sized properly — and in particular whether the minimum total dynamic head (TDH) requirement is met. It is important to understand that the TDH requirement can change with the seasons. In cold weather, the pump line can develop frost on the inside. This will reduce the diameter and increase the TDH requirement.
If there is enough of a change, the pump will not be able to push the effluent up the hill and out of the pipe. In some cases this will actually create a frozen system. After thawing the system it will work again, but over time the frost will return and again shut the system down. Be sure the discharge rate is at least 10 to 15 gpm in these pump-to-gravity systems to assure proper winter performance. In a pressure distribution system, the TDH requirement is set by the design flow.
In warm weather, a pump’s inability to deliver sufficient head may be related to a failed check valve. All valves need to open and operate properly. In check valves, the problem may be related to air locking the valve.
A check valve needs to release air as the pump starts pushing effluent into the system. Many check valves have a small air release built in, but being small, these perforations can easily plug. Drilling a 1/4-inch perforation between the valve and the pump can minimize the potential for this problem.
The final concern here is that something is stuck in the pump. Feminine products and other bathroom trash items are common causes of this problem. Effluent screens can really benefit a system in this regard by keeping all trash in the septic tank.
Pump runs backwards
If the pump runs and everything (amps and voltage) checks out, but no effluent is leaving the tank, then the pump is wired improperly. The remedy is to have an electrician rewire the pump.
If the pump runs too frequently, this implies that the home has a leaking fixture, or that the tanks are not watertight. This problem is signaled by higher-than-normal electric bills and can be spotted by a resourceful O&M service provider who has installed a cycle counter or running-time clock.
Failure of a check valve can also cause these symptoms. When checking for a failed check valve in the piping, watch the bottom of the tank after the pump has delivered a dose. If there is turbulence at the bottom of the tank, the check valve is allowing the system to empty into the tank.
If you observe this condition, but there is no check valve in the system, it is possible that the soil treatment system is not accepting effluent, and that the effluent therefore is draining back into the tank.
This information provides starting points for pump troubleshooting. For more information, check with your pump supplier or with the Sump and Sewage Pump Manufacturers Association (www.sspma.org).


