In the past two issues, we have reviewed definitions of sewage tanks and the design considerations for septic tanks. This month we begin a two-part series on the steps to follow for a good tank installation.
Any installation procedure should start with safety requirements. All excavations should comply with OSHA standards and must be done so as to prevent sidewall collapse. This means keeping the spoil pile at least two feet back from the edge of the excavation.
Proper shoring or excavation boxes should be used where necessary, or the sidewalls must be excavated back at the proper angle for the soil type.
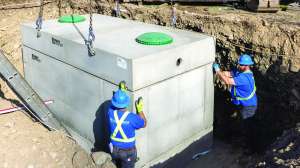
As a boom truck or other machine handles the tank, workers must stay clear of the unit and must never be under the tank. Lifting slings must be placed in the grooves of concrete tanks or attached to lifting rings. On polypropylene or fiberglass tanks, slings must be placed at the appropriate manufactured locations.
Keep it sound
The tank should be inspected for soundness before placement. Concrete tanks should have a smooth surface and be free of cracks, holes or exposed rebar. A quality plastic tank should have uniform wall thickness and be free of deformation or holes. The tank dimensions should be known beforehand so the excavation can be made to the proper depth and width.
Be sure that the building stub-out elevation is consistent with that required to install the tank and that the soil treatment components are at the correct elevations. The tank inlet must be set to provide a slope of 1 to 2 percent (1/8- to 1/4-inch drop per foot of run) on the house sewer line. Failure to provide this slope will result in freezing and plugging problems.
Proper compaction of the underlying soils and bedding materials is critical to minimize later settling and problems with the piping at the inlet and outlet. To reduce the extent of future settling, properly evaluate the original soil, bedding materials, depth to groundwater, backfill materials and potential stress loads — then take actions as appropriate.
The tank should be placed on firm and evenly compacted soil and with the soil level in all directions. The bottom of the tank excavation should be completed so that the vertical load is borne by the tank walls and not the tank bottom. Coarse bedding material should be used if the bottom of the excavation contains rock, or if required by the manufacturer’s specifications.
The excavation depth is determined by the tank dimensions and by the need to add coarse material to bed the tank. In sandy or gravelly soils, the original soil may be suitable for this bedding. Otherwise, bedding must be hauled to the site. The material needs to be level to avoid differential settling or instances where the weight of the water causes a crack in a concrete tank.
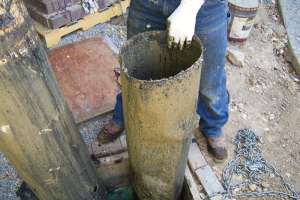
Installing baffles
Most tanks come with baffles; but in some instances the installer is expected to install the baffles. The most common type of baffle for the inlet and outlet involves the use of sanitary tees and solid piping. They are attached directly to the inlet and outlet piping. Many two-compartment tanks also have sanitary tees for baffles.
A standard PVC connection needs to be made. Pay attention to where the piping is attached. The joint of the pipes should rest on unexcavated soil, so it is important not to over-excavate the hole for the tank in the long direction. It is also important for the piping from the baffle to extend far enough out the opening to allow for connection on solid soil.
There are other types of baffles. In concrete tanks, they are often cast as a part of the tank. As the connection is made between either the inlet or outlet piping, it is important to leave enough space, particularly at the inlet, to allow solids to enter the tank and drop without hanging up or plugging the piping. Typically, this is a space of 4 to 6 inches.
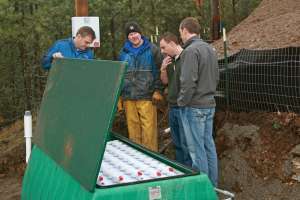
Most areas now require the use of effluent screens. These typically include a housing that acts as the sanitary tee. Alternatively, filters can be sized so that they fit directly into a standard tee. If these filters are used, an alarm must be installed so that the owner receives an early warning when the filter is becoming plugged — before sewage shows up inside the house!
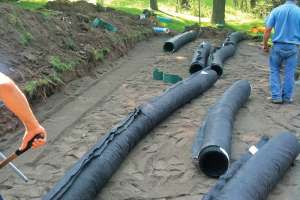
For all tanks, the pipe penetrations must be watertight after backfill. At the point of penetration, the flexible boot seals should be used. This, along with supporting any joints adequately with natural soil and backfilling with care, will ensure that the piping stays put and that the tank remains watertight and resistant to root penetration.
The piping across the excavation at both the inlet and outlet should be schedule 40 PVC or stronger to avoid any deflection problems.
Freeze prevention
In places like Minnesota, where we live, freezing can be a problem. Here, the tank may need to be insulated. If the top of the tank is less than 2 feet beneath the surface (often the case in Minnesota), the tank must be insulated. Any risers should also be insulated to a minimum R-value of 10.
The foam board insulation material needs to be resistant to water absorption, so the most appropriate materials are similar to those used to insulate the exteriors of poured concrete foundations or block wall basements.
The most common method involves placing insulation board on the top of the tank and the tank lids. This, with 2 feet of soil cover, should provide enough insulation. Spray-on insulation can supply some additional benefits for seams or openings.
Next month we will cover the backfill process, tank access considerations, and watertightness testing.
Continue reading for free