In a back room of our office, we have a wall of filing cabinets with thousands of files of onsite systems dating back into the 1970s. We have them filed by county, then alphabetically by road — once a system is installed the homeowner might change several times but for the most part, roads stay the same.
We get calls all the time asking where a system is, or a pump needs replacement and in most cases we can find the file and answer a question very quickly. People are adding pools or outbuildings and need info on the existing system. The as-built copy is part of the owner’s management plan we send to them (and we keep a copy). An accurate as-built is a critical component of proper management of any system.
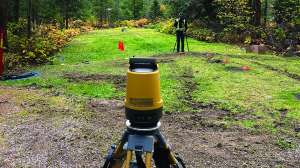
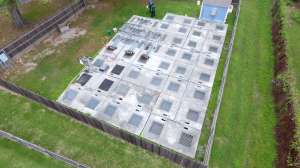
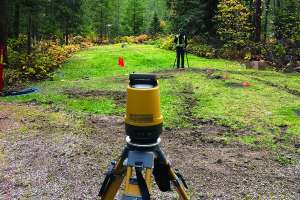
To start, it’s always a good idea to triangulate measurements to each tank access cover. This is done by showing two different measurements to each access cover from a different permanent location such as a corner of a house or door on the house or other easily found permanent landmark. By having two measurements to each access cover, it allows an easy way to find the buried access covers. New technology has us locating each access cover with our GNSS unit, which pinpoints the access covers with accuracy to the inch.
The as-built report
Our as-built report has three components:
1. The as-built drawing of the system
It never fails that after install of a system the site is going to change. The homeowner is going to add a pool, an outbuilding, etc. and needs to locate the system. (See this previous article regarding designing and installing for better maintenance; are you using tracer wire?)
The design plan you used to install the system was proposed and approved, but once you’re working at the site things can change. The as-built should reflect this. Recently we’ve begun using GNSS/Trimble to aid in our as-built drawings (as have some county inspectors). This more accurately (and quickly) generates a detailed as-built report indicating exact locations of tank access covers, piping, distribution cells, benchmarks, wells, etc.
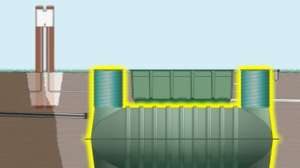
2. Elevations
An as-built should include elevations of a benchmark (and where and what was the benchmark). As-builts should include elevations of the inside bottom of the dose/pump tank or top of the pump block. Elevation of where you are pumping to is important; and note whether it is a distribution box or lateral invert. Elevations are critical for someone in the future to double-check the sizing of the pump. My daily mantra is never trust that the original pump was properly sized.
3. Other specifics
What was the diameter of the force main? What was the length of the force main? To determine accurate total dynamic head for proper replacement of the pump, the above three items, elevations and diameter and length of the force main, are each critical to a proper TDH and pump sizing.
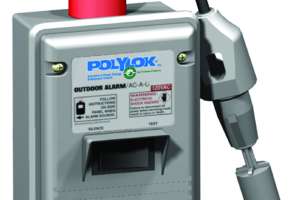
What pump was initially installed? Note the brand and model number. Was the pump wired for 115 volt or 240 volt? Single phase or three phase?
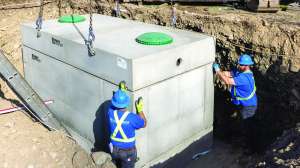
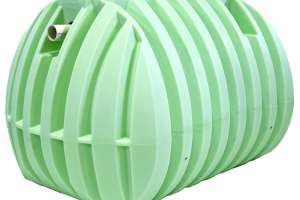
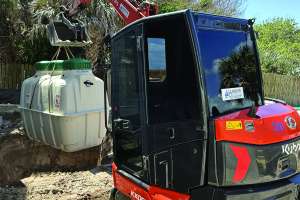
What exact tank was installed. There are many times a tank changes in the field from what was on the design plan, either by the manufacturer, or configuration (i.e., two tanks were specified but we installed a three compartment tank, etc.).
I know some won’t spend the 15 minutes gathering a good as-built because the inspector does that. Why double the effort?
I’ve had inspector’s call to say they cannot find a file and ask if we could provide specific information; not often, but it does happen. If you or someone on your crew is aiding the inspector in collecting this information anyway, that’s the perfect time to jot down this info and have it in your file.
As-built information is very important to document during the course of the day, but are you documenting safety at the beginning of every day?
Trench safety documentation
If you never remember anything else I write, remember this next sentence and by all means abide by it: You need to have a certified OSHA competent person on your crew, and each morning they should fill out a checklist regarding that day’s site.
That checklist should be turned into the office on a daily basis and scanned into an electronic file, and/or kept as a hard copy as well.
Don’t have a competent person certification? Contact your local United Rentals; they often do a great trench safety (competent person) certification class. Or contact whoever is your safety provider and train your employees in trench safety and get them certified as competent persons.
I always hear the checklist “does not have to be in writing.” That’s easy for a person to say. In practice, it is much better to have the checklist in writing. That way, should you ever have an audit of your safety practices, you can show a track record that it’s part of your daily safety protocol — which it has to be.
Our daily checklist is two pages. It is titled the Trenching Daily Checklist. The checklist aids the competent person in evaluating each site every morning from a safety perspective.
The following is not a comprehensive list, nor reflective of our daily checklist but will give you an idea of what it is imperative for your competent person to consider at the start of each day of working on a project.
Each day the checklist should start with the date and project name. Weather. Atmosphere testing where applicable. Proposed trench depth. Method of protection. Sloping/benching. Is there enough room for that? Or do you have to use shoring or a trench box because there is not enough room for sloping/benching?
A competent person has the authority to remove workers from an excavation immediately. That said, a good safety program allows any person on the crew to remove workers from an excavation immediately.
Have utilities been located? In Wisconsin our one-call system is called Diggers Hotline. Have they been at the site and marked the utilities? Has the site owner been asked about private utilities (preferably in advance so they could be marked by a private utility locator)?
Is all necessary personal protective equipment being used and available for all workers on the site? High viz, hardhats, eye protection, gloves, etc.
Protection of the excavation from falling objects around the edges. Is the spoil going to be far enough from the edge of the excavation? Are people walking by protected from falling in?
Is water getting in the excavation? Are dewatering pumps being monitored? The competent person is to inspect each excavated area daily and after any rainstorm.
A competent person who is trained and experienced to evaluate the site for safety is an OSHA requirement. Look online for OSHA Trenching and Excavation Safety, there’s a great brochure that goes into more detail and you can find training information.
But that’s a safety minimum; never rely on the minimum when it comes to safety. Back up one step and even before you get to the job site, make sure someone else knows exactly where you will be. Your office (or someone besides your crew) should have a copy of the exact address of where you will be working. Each member of the crew should know where they can quickly find the exact address of where they will be if they have to make a call in case of emergency. Are they each handed a work order with the address on it if they have to call in case of emergency? If they call your office, will the office know the address to send emergency personnel to?
Documentation is typically the last thing on a crew's mind. When they get to a job they have plenty to do. But making certain these details are followed can make a very big difference.
About the author
Todd Stair is vice president of Herr Construction, Inc., with 34 years’ experience designing, installing, repairing, replacing and evaluating septic and mound systems in southeast Wisconsin. He is the author of The Book on Septics and Mounds and a former president of the Wisconsin Onsite Water Recycling Association.
Continue reading for free